
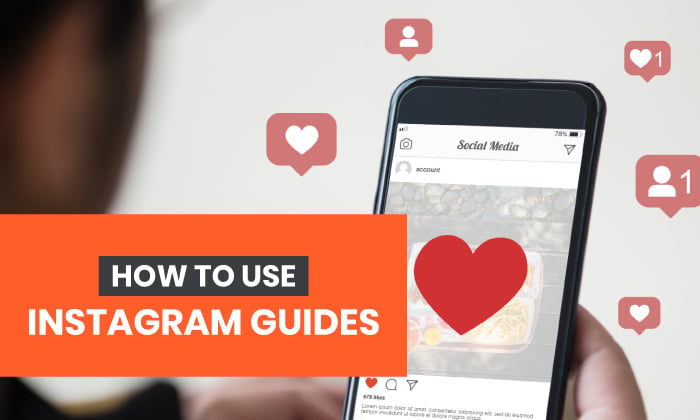
![[For beginners] Thorough explanation of how to use Instagram! A complete guide from registration to posting!](https://i1.wp.com/thepreviewapp.com/wp-content/uploads/2020/11/how-to-use-instagram-guides-feature-9.jpg?resize=1080,1080&ssl=1)
If you were to name one SNS that is currently attracting the most attention, many people would probably remember “Instagram.” Not only individuals but also companies are increasingly using it for marketing and attracting customers.
This article provides a complete guide for beginners who want to start using Instagram, from creating
an account
, basic knowledge such as posting photos and videos, to how to post videos and live broadcast. Please take a look.
What is Instagram?
Instagram is one of the SNS that specializes in posting photos and videos.
According to the results of a survey conducted by the Ministry of Internal Affairs and Communications in 2019, the most frequently used SNS services were “Twitter” at 58.3%, “LINE” at 47.4%, and “Instagram” in third place at 30.0%. It boasts one of the highest usage rates in Japan.
Compared to Twitter and LINE, Instagram is a visual-oriented SNS that allows people to edit and post photos and videos taken with smartphones. As you can see from the fact that the term “Instagrammable” was coined for a while, stylish posts are particularly popular.
You can also know about Instagram’s popularity by referring to highly influential influencers who post on Instagram and have a large number of followers as “Instagrammers.”
It has become commonplace not only for individuals to use it, but also for companies to use it for promotional purposes. Instagram has a large number of users, so if you have a product or service that suits your target audience, it can be a useful platform for communication.
![[For beginners] Thorough explanation of how to use Instagram! A complete guide from registration to posting!](https://i.ytimg.com/vi/U5i02yWZqEU/maxresdefault.jpg)
How to register for Instagram
Let’s start using Instagram right away. First, register for an account and familiarize yourself with the basic functions.
1. Create an account
After downloading the Instagram app, create an account.
If you have a Facebook account, you can log in with your Facebook account. However, if you log in with your Facebook account, it will be linked to your Facebook account, so please check if there are any operational issues.
An account can be created using either a “phone number” or “email address”. Also, set an appropriate password that cannot be guessed.
If you register using your phone number, short message (SMS), or email address, you will receive an authorization code via email, so check and enter the authorization code using either method. Once entered, tap “Next”.
Create a “Name” and “Username”. “Name” is what is displayed in bold letters in the profile section of your Instagram account page. You could say it’s a nickname on Instagram. You can also set it in Japanese.
The “username” is also used in the URL of your Instagram account page, so think of it as identification information like a symbol. Can be set using alphanumeric characters.
You may be asked to enter your date of birth, so please enter it correctly. You may also be asked if you would like to integrate with Facebook. Please respond as necessary.
2. Profile settings
Once you have registered your account, you will be able to set up your profile. You can view your profile by tapping the icon at the bottom right of the screen.
If you see an “Edit Profile” button on your account page, tap it to go to the profile editing screen.
Set a profile photo
Choose your profile photo from your smartphone’s album, or take a photo and set it on the spot. The icon represents your account, serves as identification information, and serves as a landmark, so we recommend choosing it carefully. When using images other than the original, please be careful when choosing to avoid copyright infringement.
Register your website
You can register your website. A URL link will be posted on your account page, so it’s a good idea to set the website you want to attract customers to, such as your company’s official website or e-commerce site.
Self-introduction settings
Set your self-introduction text. It represents your Instagram account page. There are many different styles, but it’s easier to see if you list your hobbies and preferences vertically using bullet points, and most fashionable accounts do this. Use other company accounts as a reference when setting up the settings.
![[For beginners] Thorough explanation of how to use Instagram! A complete guide from registration to posting!](https://swaygroup.com/wp-content/uploads/2020/11/how-to-1024x1026.png)
About the various functions on the main screen
For your reference, we will explain each function on the main screen.
First, when you start Instagram, the feed screen will be displayed. The screen changes by selecting the icon menu lined up at the bottom of the screen.
① Add a post
Press this button when you want to create a new post etc.
②Activities
Activity is a page where you can see notifications such as likes, comments, and follows on your posts.
③Direct message (DM)
This is a messaging function within Instagram. You can exchange private messages in a chat format like on LINE. You can also share posts and make video and voice calls.
④Stories tray
“Stories” posts from accounts that your account is following will be displayed. Stories are posts that disappear within 24 hours after being posted. I will explain this in detail later.
⑤Feed (timeline)
Return to the first home screen. Your posts, the users you follow, and posts from hashtags flow on your timeline and can be viewed in a list.
⑥Discovery tab
This is a search function. Search and discover users, posts, hashtags, and more.
⑦Reel
You can view short-term videos called “Reels”. I will explain the reel in more detail later.
⑧Shop
Instagram has an e-commerce function, where you can view and purchase products from your shop account.
⑨Profile
Your profile and posts will be displayed. You can set and change your profile here.
Related article:
What is Instagram? Thorough explanation of everything from login, search, and account deletion methods to Instagram ads
![[For beginners] Thorough explanation of how to use Instagram! A complete guide from registration to posting!](https://i.ytimg.com/vi/0Z4AEDyKGdI/maxresdefault.jpg)
10 features you should know before posting on Instagram
Before you start posting on Instagram, we will explain 10 features of Instagram that you should know. By keeping these things in mind, your posting will go smoothly.
“Like” function
“Like” is a communication method commonly used on SNS to express that you “like” something. You can react to what you think is a good post without even adding a comment. On Instagram, it is represented by a heart icon, and if you want to “like” a photo, you can do so immediately by tapping the heart icon at the bottom of the posted photo. When the heart mark turns red, it is complete.
“Comment” function
You can add comments to posts. It is represented by a speech bubble icon. You can add your thoughts on the post. Tap the speech bubble icon below the posted photo, enter the text, and tap “Post” to send.
“Share” function
Sharing is a feature that allows you to send other users’ posts via direct message. It is represented by a paper airplane icon. To share, tap the paper airplane icon below the posted photo, specify the user you want to share it with, and press the send button.
“DM (Direct Message)” function
This feature allows you to exchange private messages with other users. You can share text, photos, and posts. You can send messages even to people you don’t follow or aren’t followers. Corporate account operators are used to send winning messages to winners via DM, for example when running an application campaign on Instagram.
“Hashtag” function
Hashtags are like labels that users use when searching. It is expressed in the format “#○○○○”. It’s like a keyword search. For example, by setting your favorite words such as “#Fashion” or “#Gourmet” when posting, you can make it easier for users to discover your posts. When you look at posts on Instagram, you can see multiple hashtags lined up after the post, so check them out.
“Tagging” function
Instagram allows you to associate other users’ accounts with your posts. That’s the tagging feature. You can set a link anywhere in the photo or video you like when posting. If you add a tag, a user who sees the post can tap on it to go to the tagged account.
“Archive” function
The ”
Archive
” feature allows you to hide posts after posting them to your account. This is convenient because you can hide posts without having to delete them. You can hide feed posts, stories, and live videos.
“Account block” function
Account blocking is a feature that allows you to hide your posts from specific users and restrict interactions such as DMs and comments. For corporate accounts, this can be used to deal with malicious users who repeatedly send spam messages or slander.
Privacy setting function
Instagram accounts can be made private. You can make it visible only to followers you approve.
shopping function
The shopping function allows you to link photos posted on Instagram with product pages on e-commerce sites, creating a conduit that allows users to purchase products smoothly. There are conditions for use, so this feature is not available to everyone. However, since many corporate accounts are already using it, the hurdles may not be too high.
Related article:
Companies that are not seeing results on Instagram/What are the key points needed for success?
![[For beginners] Thorough explanation of how to use Instagram! A complete guide from registration to posting!](https://godreamcast.com/blog/wp-content/uploads/2023/05/Instagram-Stories-and-Reels-featured.png)
How to post to Instagram feed
Now, let’s check the steps to post a feed on Instagram.
How to post photos/videos
1. Select or shoot photos and videos to post

Tap the icon with a “+” surrounded by a square at the top right of the screen. A menu will appear, so tap “Post” at the top.
Then, photos and videos saved on your smartphone or other device will be displayed. This means that you can select photos and videos to post from here. If you see “No media available,” change your settings to allow Instagram to access photos on your device.
If you want to take a new photo or video instead of an existing photo or video, tap the camera icon at the bottom right of the screen to start the camera, so you can start shooting right away.
You can resize the photo by selecting the photo and tapping the icon that looks like a square bracket at the bottom left.
2. Process photos and videos
After selecting a photo or video or shooting a new one, you will automatically move to the editing screen. Here, you can apply “filters” and use “edit” to adjust brightness, saturation, etc.
When processing is complete, tap “Next”.
3. Create a post

On the next screen, you can edit your post. Enter the text for your post. The maximum number of characters for each post is 2200 characters (as of March 2022), including the hashtag. You can also use emojis, so be creative when creating text so that users can read it.
4. Add hashtags, location information, etc. and post
Also include hashtags in your posts. The key is to choose keywords that are likely to be searched by the users you want to see what you are about to post.
Also, add locations related to the content of your posts by “tagging” other accounts or “adding locations.”
5. Tap “Share” to post
Once you have completed your post, tap “Share” in the top right corner to complete the post.
How to delete a post
If something goes wrong, you can delete or hide the post. To delete a post, display the post you want to delete, then tap the menu button with the “…” mark in the upper right corner and select “Delete”. When the message “Do you want to delete the post?” appears, tap again. Tap “Delete” to complete. Deleted posts are stored in the “Recently Deleted” area and can be restored within 30 days.
If you do not want to delete it, use the “Archive” function introduced earlier to hide it. To archive, tap the “…” mark as before, then tap the “Archive” button in the menu that appears.
![[For beginners] Thorough explanation of how to use Instagram! A complete guide from registration to posting!](https://www.freecodecamp.org/news/content/images/2020/10/IMG_7283.PNG)
How to post “Stories” on Instagram
Next, we will introduce how to post “Stories”.
What is “Stories”?
Stories are posts that disappear within 24 hours after being posted. You can use it conveniently when you want to post something trivial, for example when you want to tweet something on Twitter. Another feature is that it leaves a trace of the people who viewed it, so you can check which users have viewed it.
If you don’t want it deleted after 24 hours, you can leave it as a “highlight” under your profile on your account page.
How to post “Stories”
Let’s take a look at how to post Stories.
1. Select the “Stories” menu
Tap the icon with the “+” surrounded by a square at the top and select “Stories” from the menu, or swipe the feed screen from left to right to move to the story creation screen.
2. Select and shoot photos/videos
Similar to feed posts, you decide on the content for your post by selecting a photo or video, or by shooting it on the fly.
To take a photo or video, tap the white circle button at the bottom center. Press and hold to record a video. Videos are limited to 15 seconds per story post. If you shoot more than that, it will be automatically divided. Video recording will stop when you release your finger.
If you want to select photos or videos saved on your device, tap the square icon at the bottom left to display a list.
3. Process photos and videos
Next is processing. You can doodle, add text, and stamps to photos and videos.
4. Post
I will post it when I finish processing. Tap “Stories” at the bottom left and you’re done.
![[For beginners] Thorough explanation of how to use Instagram! A complete guide from registration to posting!](https://www.brax.io/hubfs/How to Advertise on Instagram_Brax.png#keepProtocol)
How to post “Reels” on Instagram
Next, we will show you how to post a “Reel”.
What is a “reel”?
Reel Video is a feature that allows you to create and share short videos of up to 60 seconds. The feature is that you can post videos vertically on the full screen of your smartphone. In addition to basic editing such as text and stamps, it also has extensive video editing functions such as adding BGM and AR effects. Unlike Stories, it does not leave any traces of users who view it.
Reels are also displayed in the “Discover” tab, which has the advantage of making it easier for users other than your followers to find you. It feels like you can post videos on Instagram similar to the video SNS “TikTok”. Once you post a Reel, you can view it in a list by tapping the “Video” icon in the center of your account page.
How to post “Reel”
Let’s take a step-by-step guide on how to post a Reel.
1. Select the “Reel” menu
Tap the icon with the “+” surrounded by a square at the top and select “Reels,” or swipe the feed screen from left to right to move to the story creation screen, where “Stories” is selected. Selecting “Reel” will take you to the reel creation screen.
2. Shoot a video
Tap and hold the round video button at the bottom center to record a clip. Tap again to end shooting. You can also tap the square icon at the bottom left to select a video that exists on your device.
3. Add sound sources, effects, etc. to the video
When recording videos, you can use the vertical menu on the left to access various functions. “Length” changes the length of the video, “Sound source” adds music from the library, “Speed” changes the video recording speed, “Effect” adds an AR effect, “Timer” the recording time of the video clip You can specify.
4. Process the video
Next is processing. By tapping the “<” icon to the left of the central video button, you can play, trim, or delete previously recorded clips.
You can add stamps, graffiti, and text to the video by tapping the “>” icon on the right or “Preview”. You can also download videos to your device.
4. Post
I will post it when I finish processing. You can change the cover photo by tapping “Share” and then “Cover”. A cover is a cover photo for a video that is displayed before the video is played. The cover can be a scene from a video or an image saved on your device. After choosing a cover, tap the “Share” button at the bottom to complete posting.
Related article:
How have the insights of SNS users changed during the coronavirus pandemic? Twitter and Instagram analysis results published (Trenders)
![[For beginners] Thorough explanation of how to use Instagram! A complete guide from registration to posting!](https://ishanmishra.in/wp-content/uploads/2021/05/maxresdefault-1.jpg)
How to implement “live streaming” on Instagram
You can also live stream video and audio on Instagram. We will introduce its features and implementation methods.
What is “live streaming”?
Live streaming is called “Insta Live,” and it is characterized by the ability to send comments and hearts (likes) through live streaming, allowing you to communicate with fans in real time. The streaming method is very simple, and anyone can live stream with just a smartphone, just like shooting a video. There is a question function, a footprint function, a participation request function, etc. There is also a collaborative streaming feature that allows up to four other users to stream at the same time.
How to implement “live streaming”
Now, let’s do a live broadcast.
1. Select the “Live” menu
Tap the icon with the “+” surrounded by a square at the top and select “Live,” or swipe the feed screen from left to right to move to the story creation screen, where “Stories” is selected. Selecting “Live” will take you to the live streaming screen.
2. Add a title
First, give a title to the live broadcast you are about to perform. On the left side of the screen, you will see an icon with four horizontal lines lined up vertically, so tap on it to set the title. The title will be displayed in the top left during the live broadcast.
3. Tap the button to start live streaming
You can start live streaming by simply tapping the white circle button at the bottom center.
4. Items that can be operated and checked during live streaming
In addition, during live streaming, you can add effects and illustrations, and display photos saved on your device to show to your viewers. This is useful when you want to explain while showing materials. There is also a function to ask questions, so feel free to use it as needed.
Related article:
Which SNS is effective for marketing? Facebook, Twitter, Instagram?
summary
- Instagram is one of the SNS that specializes in posting photos and videos, and compared to Twitter and LINE, it is a visual SNS that allows people to edit and post photos and videos taken with smartphones.
- Features you should know about before posting on Instagram include likes, comments, shares, DMs, hashtags, tagging, archives, account blocking, privacy settings, and shopping features.
- The steps to post a feed on Instagram are: 1. Select or shoot photos and videos to post, 2. Process photos and videos, 3. Create a post, 4. Hashtags, location information, etc. “Add and post” and “5. Tap “Share” to post.”