

If you’ve ever thought about creating a website or blog, you’re probably familiar with a tool called
WordPress
. WordPress is a CMS (content management system) that allows you to easily create websites and blogs for free.
In this article, we will explain how to start and use WordPress for beginners who want to start using a website or blog. After reading this article, you will be able to use WordPress. Please watch till the end.
What is WordPress?
What kind of tool is WordPress? WordPress is an
open source
CMS (content management system)
developed in 2003. With WordPress, you can easily create a website or blog for free. Currently, 42% of websites around the world are created using WordPress, and it can be said that it boasts an unrivaled market share.
The features of WordPress are as follows.
WordPress allows you to easily create websites and blogs without any programming knowledge such as
HTML
or
CSS
. Furthermore, the operations for creating and updating are very easy, making it an easy-to-use CMS even for beginners.
Additionally, since WordPress is open source, it is expected that it will be customized in various ways. Therefore, the degree of freedom in adding extensions and customization is overwhelmingly different than other website/blog creation services.
The most attractive part for beginners is that WordPress is free to use. WordPress is license-free and open source, so you can use it for free without worrying about copyright issues.
However, be aware that when using WordPress, you will need to prepare a paid server and domain. Costs vary, but please keep in mind that it will cost approximately 10,000 to 20,000 yen for the rental server fee and domain acquisition.
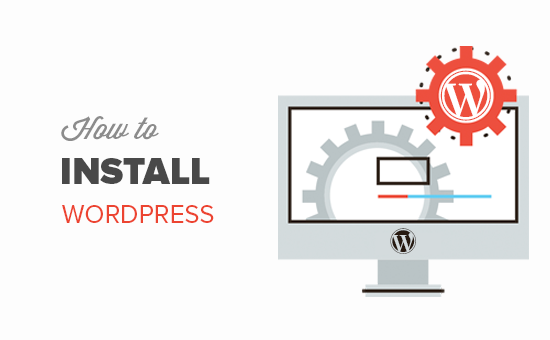
How to install WordPress
From here, let’s move on to an explanation of how to actually use WordPress. First, we will explain in detail how to install WordPress.

Get started with the quick start on the X server
To easily start using WordPress, we will explain using the “WordPress Quick Start” function, which was launched in April 2020 by X Server, the rental server with the No. 1 market share in Japan. There is also a way to install WordPress software on a server, but this method takes time and effort.
First, access
the X server application form
. Then select “10-day free trial new application”. Next, check “Use” “WordPress Quick Start”. When checked, the required items will be displayed.
Select server plan/domain
Next, choose your server plan and domain. Leave the server ID displayed at the top unchanged, and check “X10 Plan” under Plan. In addition, you can also choose the “X20 Plan” and “X30 Plan” depending on the features that can be used, but the “X10 Plan” is fine to start with. The contract period can be selected from 3 to 36 months, so please select the period as well.
Then, choose a domain. If you want to keep the initial cost down, choose a domain name that costs 0 yen. You are free to choose any domain name.

Enter your WordPress information and confirm your application.
Then, enter your WordPress information.
Enter these. Next, enter your registration information.
Let’s enter the information above. Then enter your credit card information under “Payment Information.” There is also a check box for sending information emails, but there is no problem whether you wish to do so or not. If you wish, please check “Yes”.
Finally, please check the terms of use and disclosure matters regarding personal information, check the “Agree” box, and press the “Proceed to application confirmation” button. If there are no problems with your application, click “Proceed to SMS/phone verification.”

Receive the setup completion email and the installation is complete.
Clicking “Proceed to SMS/phone verification” will take you to a screen where you can choose whether to receive the verification code via SMS or phone. Click the “Get verification code” button to receive the verification code via SMS or phone. Once you have obtained the verification code, enter it into the application form to complete the application process.
Finally, a notification email will be sent to you within a few minutes upon completion of your application. The subject of the email sent is “[xserver]■Important■Notice of completion of server account setup.”
After receiving the email, you will be able to access the website/blog you created in about an hour at most.

How to log in to the WordPress admin screen
From here, we will explain how to log in to the WordPress admin screen. First, click on the “site URL” provided in the email. If your website/blog is displayed here, the installation has already been completed.
Once you have confirmed the installation, click the management screen URL provided in the email to access the login screen. Enter your username (or email address) and password in the input fields and click Login.
Clicking it will launch the management screen. The WordPress installation is now complete.

Initial settings required for WordPress
Now, the WordPress installation is complete. From here, let’s perform the initial settings necessary to actually use WordPress.
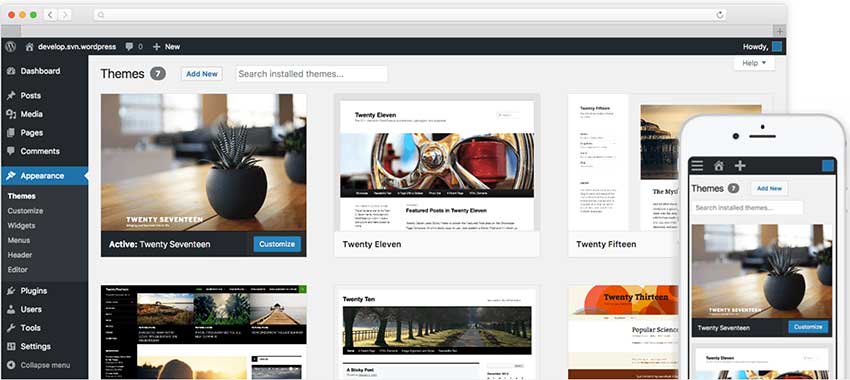
Select the theme to use (free/paid)
First, choose a theme to use with WordPress. WordPress has a wide variety of design themes, and you can choose from free ones to paid ones. First, click “Appearance” in the menu on the left side of the WordPress admin screen. When the “Themes” screen appears, click “Add new” at the top.
You will then be presented with themes to choose from. Select a theme that matches the concept and purpose of the website you want to create, and click “Install”. When the message “Installed” appears, click “Activate” in the bottom left corner to complete theme selection.
You can also search for paid themes on search sites such as Google. Most of them are priced around 10,000 yen, so if you find a theme that matches your concept, one option is to use a paid one.

Introduction of plugins
Next, install the plugin.
Plugins
are external devices that extend the functionality of your site.
By introducing plug-ins, you can add the necessary functions to your site, such as an “inquiry form” or a “reservation function.” The plug-ins you need will change depending on the purpose of creating your website, so be sure to think carefully about the functions you need for the website you want to create.
Decide on a site name
Next, decide on a site name. When installing WordPress, you have already entered the site name, but we will explain how to proceed if you have entered a temporary site name or want to change it.
First, select “Settings” from the menu on the left side of the WordPress admin screen and click the “General” button. Then, the “Site Title” and “Catchphrase” will be displayed at the top.
If you want to change the site name, enter it in the “Site Title” field and click “Save Changes” at the bottom of the screen. The site name has now been decided.
Set permalink to postname
Finally, let’s set up permalinks.
Permalink
refers to the URL set for each page of a website. If this permalink is changed after the website is created, the URL will be changed, which may cause problems when displaying the website. Therefore, be sure to set permalinks at the creation stage.
We recommend setting the permalink using the post name (post name). Google has stated that it evaluates websites with URLs such as the following.
In other words, if you set the permalink with the post name (post name), your website will be evaluated by Google, so it is better to set the permalink with the post name (post name). Now, I will explain the steps to set a permalink to the post name (post name).
Select “Settings” from the menu on the left side of the WordPress admin screen and click the “Permalink Settings” button. Then, check “Post Name” from the displayed items. The initial settings are now complete.
However, at this stage, the permalink is in Japanese, so you need to change it to English. When you submit an article, the submission screen will be displayed, so don’t forget to click the “permalink” on the right side of the screen and change the article title to English.
What you need to do to launch WordPress and start a website
Now, I have explained the initial settings of WordPress. Finally, let’s explain what you need to do to start a website created with WordPress.
Register with Google Search Console
Google Search Console is a free analysis tool that allows you to see how many visitors you get from Google searches and what search keywords they used. Be sure to register as it will be very useful when considering SEO measures for your website.
Unlike Google Analytics, which will be introduced in the next section, Google Search Console can be said to analyze user behavior before visiting a page and how the site is viewed by search engines.
To register Google Search Console, you will need a Google account. Create a Google account and register with Google Search Console.
Register with Google Analytics
Google Analytics is an analysis tool that allows you to analyze the behavior of users visiting your site’s pages.
With Google Analytics, you can check the following things.
A Google account is also required to register Google Analytics.
Take a backup of WordPress
Websites and blogs created with WordPress may disappear due to operational errors, forgetting to save them, or computer malfunctions. To prepare for such a situation, please make regular backups.
There are two types of backup methods: “automatic backup” and “manual backup”. For beginners, it may be sufficient to use the backup service provided by XServer.
This backup service can be used without any application and is hassle-free. However, please note that there is a shelf life. If you want to save a lot of content or want to save it for a long time, please use a backup plugin called “BackWPup”.
Create a SNS account and prepare to spread the word
It is no exaggeration to say that SNS is now essential in order to increase the number of traffic to websites and blogs. The use of SNS such as Twitter and Instagram, which are used by tens of millions of people worldwide, is important for disseminating information.
Choose an SNS that is suitable for your website/blog and create an account. After that, install the “SNS button” necessary for sharing on SNS in WordPress. There are two ways to create the “SNS button”: “use the official theme function” in WordPress, or “use a plugin.”
If you are a beginner, it will be easy and convenient to use the official theme feature that comes standard with the “SNS button”. If your chosen theme does not have a SNS button, be sure to use a plugin to install one.
Create and publish articles
Creating a website or blog is not the end. To enrich your content, create and publish articles.
After creating an article, don’t forget to set categories, tags, and featured images. Also, make it a habit to preview the article to see how it will actually appear before publishing. Once you have done the above, please follow the steps to publish your article.

Summary: Start a website with WordPress
You can easily create a website or blog using WordPress, which boasts a market share of over 40% worldwide.
Let’s start a website/blog using the way to start using WordPress introduced in this article. Also, be sure to check out the things you need to do before you start.
Preparation before launching a website with WordPress is very important. Before using WordPress, think carefully about the concept of the website or blog you are trying to create.