

WordPress has become indispensable for companies to conduct
web marketing
. It is a particularly useful tool for building blogs and
owned media
, creating articles to disseminate information, and implementing
SEO
measures.
WordPress
is used a lot every day, but you may have many questions when you are just starting to use it. You may not know how to log in, or you may know how to log in but an error occurs. So this time, we will explain how to log in to WordPress, and what to do if you can’t log in.
How to log in to WordPress
First, we will introduce the basic login method.
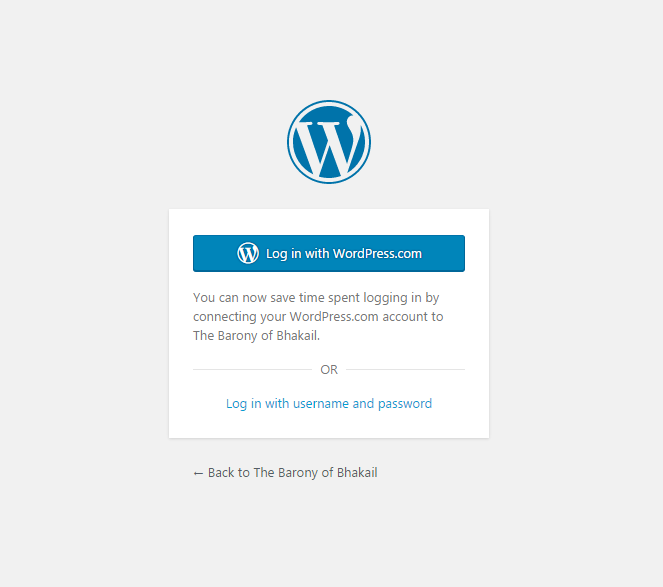
1. Access the WordPress login screen
2. Enter your user ID and password

1. Access the WordPress login screen
First, access
the WordPress login
screen. The URL of the login page is usually “http://homepage URL/wp-login.php”.
The site URL part includes your company’s domain name, subdirectory, etc. In any case, the login URL is the location where WordPress is installed with “wp-login.php” appended.
2. Enter your user ID and password
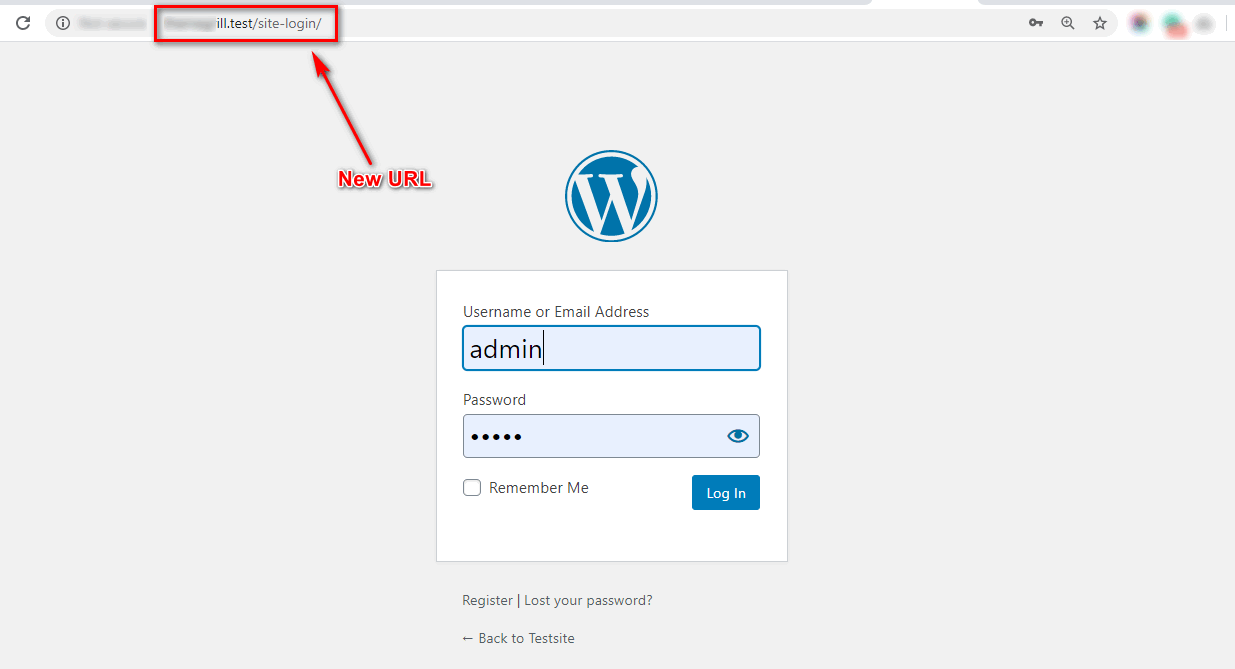
When the login page opens, enter your “User ID (or email address)” and “Password”. The “User ID (or email address)” and “Password” are the ones you set when you installed WordPress.
For example, if you are using a service on a rental
server
such as X Server, you probably entered your user ID and password during setup on the rental server’s website. Please check the settings at that time.
If it was built by the information systems department, please contact us to confirm. After entering your “User ID (or email address)” and “Password”, you will be redirected to the management screen. Login is now complete.

How to log out of WordPress
Next, let’s take a look at how to log out of WordPress.

Finally, the logout screen will be displayed as shown below and will say “You have been logged out.”
Causes and solutions if you cannot log in to WordPress
When logging in to WordPress, one of the most common problems you may encounter is that you can’t log in for some reason. In this case, there are many possible causes, so let’s check them one by one.
Username (email address) and password are incorrect
The first possibility is that your username or email address and password are incorrect. If it is incorrect, of course you will not be able to log in. As mentioned earlier, there are several ways to find out your username, email address, and password, such as checking the rental server settings or contacting the information systems department.
However, it may not be possible to check. In that case, only the password can be reset. Please access the login screen. Below the fields where you enter your username and password, you’ll see the words “Forgot your password?”

Clicking on it will take you to another screen where you will see an input field for your username or email address. Enter your email address there. Then click the “Get new password” button.
An email will then be sent to the email address you entered, containing a link to reset your password. Click the link to access WordPress and set a new password.
From now on, you will be able to log in with the new password. Be sure to manage your reset password carefully so you don’t forget it, and be careful about security.
Login URL is incorrect
The next cause is that the login URL is incorrect. A common problem is logging in using the following URL.
“http://Homepage URL/Directory where WordPress is installed/wp-admin”
Earlier, I told you that the “wp-admin” part of the page for logging into WordPress is “wp-login.php”. In other words, the wp-admin part is different.
Actually, even if you access with wp-admin, the login screen is displayed, but if you access with wp-admin, you may suddenly become unable to log in even if you have the correct username or email address and password. There is.
It is said that there are various possible causes. If you cannot log in, please check if the URL is “wp-login.php”. Then you will be able to log in.
The information stored in cookies is outdated
The following is a case where you are unable to log in due to
cookies
.
Cookie is pronounced “cookie”. When we access a homepage using a web browser, the files created by that homepage are called cookies. This file stores browsing information. That cookie can then be used to keep you logged in.
It can also remember your home page usage settings. Additionally, by retrieving the user’s region, you can provide information related to that region. Cookies are generated by each browser and then stored on the computer we are using. This means that if you delete it, the cookie will be gone.
Normally, if you do not allow cookies to be saved, information when logging into WordPress is also saved in cookies. In other words, it has become easier to log into WordPress. However, if incorrect information is stored in the cookie, it will prevent you from logging in.
What should I do? The answer is simple. All you have to do is delete the WordPress cookies. This is done by operating on the settings screen of each browser.
The procedure is different for each browser, but the general flow is as follows.
(1) Open the browser’s cookie management screen (2) Select the menu for deleting cookies for each homepage (3) Find the WordPress domain name (4) Delete cookies for the WordPress domain name
Below is an explanation from the official website about how to delete cookies from specific sites in the most popular browsers, Google Chrome, Microsoft Edge, and Firefox. Delete cookies using the method of the browser you are using.
How to delete cookies from specific sites in Google Chrome
1. Open Chrome on your computer
2. Select “More icon” in the upper right corner, then click “Settings”
3. Next to “Privacy & Security”, click “Cookies and other site data”
4. Click “Show all cookies and site data”
5. Search for your WordPress domain name in the top right field.
6. Once you find it, click “Delete” on the right side of the site.
Reference:
Google Chrome Help
Microsoft Edge How to delete cookies from specific sites
1. Open Microsoft Edge and select Settings and more > Settings > Cookies and site permissions > Cookies and site data.
2. Select “Show all cookies and site data”
3. Find and delete cookies for your WordPress domain name
Reference:
Microsoft Edge support
How to delete cookies from specific sites in Firefox
1. Launch Firefox, click the menu button with three horizontal bars in the upper right corner, and select “Settings”.
2. Select the “Privacy and Security” panel and go to the “Cookies and Site Data Section”
3. Click “Manage data…” and the “Manage cookies and site data” dialog will be displayed.
4. In the Search website field, enter the name of the site whose cookies you want to delete. Items matching your search will be displayed. To delete selected items, select the items and click Delete selected site data.
5. Click “Save Changes”
6. Click OK in the “Delete cookies and site data” confirmation dialog.
Reference:
Firefox Help
Once the cookies have been deleted, visit the WordPress login page and try logging in again. If you can log in, then cookies are probably the culprit.
“404 Not Found” is displayed and you cannot log in
This is what happens when you try to log in to WordPress but get a “404 Not Found” message. This means “website not found.” If this message appears, it may be because you have mistakenly changed the “WordPress address (URL)” or “site address (URL)” in the settings on the WordPress management screen. .
In other words, the website address was incorrect, resulting in a message that the website could not be found. First of all, what exactly are a WordPress address (URL) and a site address (URL)? The WordPress address (URL) refers to the server where WordPress is installed.
On the other hand, the site address (URL) is the address that you access when viewing a website built with WordPress. The WordPress address (URL) and site address (URL) may or may not be the same.
For example, if WordPress is installed in a directory called “wp” in the domain “wordpress_aaa_bbb.com”, it cannot be accessed from “https://wordpress_aaa_bbb.com”. This means that the address must be “https://wordpress_aaa_bbb.com/wp/”.
To solve this problem, first of all, you cannot log in to WordPress, so you cannot change it from the admin screen. So what should we do? Generally speaking, you can access the WordPress database directly and rewrite the settings. Users can also rewrite the settings by logging into an application called “phpMyAdmin” that allows them to operate the database from the web.
phpMyAdmin is often provided by rental servers and can be operated by logging in. I will omit the detailed explanation here, but you will be able to log in by modifying the “siteurl” and “home” URLs in “wp_options” that exist in the WordPress database and saving them. If you have any questions, please contact the server provider.
“500 Internal Server Error” is displayed and you cannot log in
The next case is when you are unable to log in to WordPress because the message “500 Internal Server Error” is displayed. This is an error message indicating that there is an error on the server.
In this case, there may be multiple causes, but it tends to become angry after updating WordPress to the latest version, updating the WordPress theme, or updating WordPress plugins. These problems occur when the PHP version of WordPress is outdated.
So the solution is to update the PHP version of WordPress. If you are using WordPress provided by a rental server, you can generally log in to the rental server and update the PHP version. If you find yourself stuck on an older version, be sure to update. Then, try logging into WordPress again. The update method varies depending on the rental server.
“403 Forbidden” is displayed and you cannot log in
Next, when you try to log in to WordPress, you get a “403 Forbidden” message. This is also one of the cases where you cannot log in. This error message means that you do not have permission to access the web page, that is, it is prohibited.
This is more likely to be due to a loss of permissions for the server you are using, rather than a problem with WordPress. This means that the server contract has expired. Log in to the rental server’s homepage and check the contract period to make sure it has not expired.
Other causes – database, plugins, themes, etc.
In addition, you may not be able to log in due to database, plug-in, theme, etc. For example, “Database connection error” may be displayed.
In this case, it may occur if an error occurs on the server such as the server going down, if the capacity limit of the server you are using has been exceeded, or if the database is damaged. Let’s check the server once.
If the problem is caused by a plugin or theme, it is likely to occur if you update or add a WordPress plugin or theme. For example, the latest version of a plugin has been released, so you decide to update it, but after the update is completed, you can no longer access or log in to WordPress.
The solution in this case is to disable the plugin or theme. Since you cannot log in, you can disable it by using FTP software and changing the name of the folder where the relevant plugin or theme is stored on FTP.
Access the folder where WordPress is stored using FTP software, and inside the “wp-content” folder, you will find plugins in “plugins” and themes in “themes”. Please change the folder name of the relevant plugin or theme to something else.
Plugins and themes will then be disabled. However, there is a risk of tampering with other files, so please do this only if you are familiar with using FTP software.

What to do when you don’t know your WordPress login information
Here are some things to do if you don’t know your WordPress login information.
What to do if you don’t know your password
If you do not know your password, follow the steps below to reset your password.
1. Access the WordPress login screen
2. Click the “Forgot your password?” button displayed below the ID and password input fields.
3. Enter either the username or email address you set when installing WordPress and click the “Get new password” button.
4. A password reset email will be sent to the email address you set.
5. Click the URL in the reset email to display a new password setting screen in your browser.
6. Enter your new password and click “Save Password”
7. You will be redirected to a screen that says “Your password has been reset.” Click on the “Login” link displayed next to the message.
8. Go back to the WordPress login screen
9. Enter either the username or email address you set when installing WordPress, enter the newly set password, and click the “Login” button.
What to do if you don’t know your username or email address
If you do not know your username and email address, you can check them from the rental server you are using. Below, we will explain the procedure using Xserver as an example.
1. Access the Xserver login screen
2. Log in by entering your email address and password
3. Click “Server Management” from the Xserver management screen to move to the “Server Panel” screen.
4. Click the “File Manager” button displayed at the top of the screen
5. A list of domains registered in Xserver will appear, so click on the domain.
6. Click “public_html” on the next screen
7. On the next screen, select “wp-config.php” and click “Edit”
8. “wp-config.php” will open and the file contents will be displayed.
9. The database name, “database” user name and password are listed in the file contents, so write these down in a notepad etc.
10. Go to the Xserver server panel again and click “phpMyAdmin” from the database item.
11. The login screen will be displayed, so enter the “user name” and “password” you wrote in the notepad earlier to log in.
12. The “database name” that you wrote in the notepad earlier is displayed in the sidebar on the left side of the screen, so click on the database name.
13. A list will be displayed, so click “wp_users”
14. The next screen will display the username and email address you set up in WordPress.
15. The user name displayed in the “user_login” field is the user name, and the email address you set is displayed in the “user_email” field.

The need to strengthen WordPress security measures
One thing you need to be aware of when using WordPress is the constant need to strengthen security measures. WordPress is an open source blogging software and anyone can learn how it works.
Because it is highly extensible and engineers can freely create plug-ins, it cannot be denied that security is extremely vulnerable. Additionally, it has a large number of users, making it an easy target for cyber attacks.
Against this background, it can be said that WordPress is constantly under pressure to take security measures. In the event of a cyber attack, the following damage will occur:
Information leakage
If your information is leaked, hackers can steal everything stored in WordPress. This may be fine if the website is run by only an individual, but it can become a big problem if a large number of other people’s information is registered on a membership site. The website operator will be held responsible for any information leaks, which may lead to litigation.
Tampering with information
Tampering with information is when a hacker infiltrates the operator’s website without permission and rewrites the content. If the content of the homepage has been changed without your knowledge or if an unintended image is displayed, there is a high possibility that it has been tampered with. Additionally, if your username or password is changed without permission, you will no longer be able to log in.
How to strengthen WordPress security
So far, we have introduced the causes and solutions for not being able to log in to WordPress. In this context, let’s think a little more about the WordPress login screen. The most important thing to be aware of when logging into WordPress is security. Consider the possibility that someone could log in to your WordPress login screen, and strengthen the security of your WordPress login screen.
Why do you need to strengthen the security of your WordPress login screen?
You may have heard that the login screen will be more secure, but you may be wondering why you need to do so. The first thing you should know is that WordPress is an open source CMS (content management system) used by people all over the world.
The fact that the source is public means that it is easier to think about where and how to break through the security and infiltrate, and then execute it. There is no shortage of people who take advantage of vulnerabilities and launch cyberattacks.
As I mentioned earlier, the login screen is basically displayed when you access “/wp-login.php”. This means anyone can access your WordPress login screen. There is also a cyber attack method called Bluetooth attack that uses various methods to identify passwords, so if you are the target, there is a risk of being broken through.
Of course, perfect security measures are difficult, but it is by no means pointless to increase the security of the login screen and raise the level of defense.
1. Customize the login screen to strengthen authentication
2. Restrict access to the login screen
3. Change the login screen URL
4. Strengthen your login password
1. Customize the login screen to strengthen authentication
This is how to customize the login screen using WordPress plugins. Here we will introduce two plugins.
SiteGuard WP Plugin
You can strengthen your security by installing a plugin called “SiteGuard WP Plugin”. It has various functions, but you can add “image authentication” to the login screen. With image authentication, for example, a random image of hiragana or alphanumeric characters is displayed, and the user types the characters from that image into an input field to authenticate. This will prevent unauthorized logins.
This plugin also has the ability to change the login page URL. The login page address is “wp-login.php”, but you can change the name of this wp-login.php. Initially, the address will be “login_<5-digit random number>”. Change the 5 digits of this to something that cannot be freely analogized.
Two-Factor
By using a plugin called “Two-Factor”, you can add two-factor authentication to your WordPress login. This is what is called two-factor authentication. Two-factor authentication means, for example, in WordPress, you log in with your ID or email address and password, but this is one-factor authentication. Two-factor authentication is an additional layer of authentication added to this.
For example, two-factor authentication is when a one-time password is automatically sent to the email address you entered, and you are authenticated by viewing the email and entering the one-time password. “Two-Factor” allows you to set up two-factor authentication.
There are three ways to set the second factor: entering the authentication code sent to your email, entering a one-time password from Google Authenticator, and entering a security key called FIDO authentication. . You will have to log in yourself, so choose the one that is most convenient for you.
2. Restrict access to the login screen
Next, we will show you how to restrict access to the WordPress login page and prevent third parties from accessing it. There are multiple ways to do this, but here we will introduce two methods.
BASIC authentication
BASIC authentication is a method that allows you to set access restrictions to pages and websites. BASIC authentication is a server-related method, so it may be difficult if you don’t have server knowledge. Ask your information systems department to set this up.
Use plugins
Several plugins have been released that allow you to restrict access to WordPress. You can easily restrict access by simply installing them and configuring them from the WordPress admin screen. However, the disadvantage is that plugins cannot be easily installed because they may cause errors if they are not compatible with other plugins or themes.
You also need to consider that updates and support for plugins will be discontinued. It is fine if you use it when you want to restrict access as an emergency measure. In other cases, we recommend that you ask a professional to restrict access.
3. Change the login screen URL
You can easily change the URL of the login screen by using a plugin called “WPS Hide Login”.
1. Log in to WordPress
2. Click “Plugins” from the left menu
3. Click “Add new plugin” at the top of the screen
4. Type “WPS Hide Login” in the search box
5. The relevant plug-in will be displayed, so click “Install now”
6. When the “Activate” button appears, click it to activate it.
7. Click the “WPS Hide Login” setting from the plugin menu again
8. There is a “Login URL” item on the “WPS Hide Login” setting screen, so enter the string in the input field.
9. Click Save Settings
Please note that if you forget the URL you set above, you will not be able to access the login page, so be sure to write down the changed URL somewhere and keep it safe.
4. Strengthen your login password
To strengthen your login password, follow the steps below.
1. Log in to WordPress
2. Click the user from the menu on the left
3. Click the username to move to the profile screen
4. We will scroll down the “personal option” screen down
5. There is an item for “New password”, click “Set New Password”.
6. Then, a powerful password that WordPress pops out randomly will be displayed.
The password you set will be vulnerable, so you can enhance your password by setting WordPress in a random string.
How to create another account with WordPress
To create another account with WordPress, use the following procedure.
1. Log in to WordPress
2. Click “Add New User” from “User” from the left menu
3. Move the new user to the additional page
4. Enter “User name”, “Email”, etc.
5. Set the authority to give to the user in the “Authorized Group” item (basically is OK with “administrator”)
6. Click “Add New User”

summary
- To log in to WordPress, access the login screen “http: // site URL/wp-login.php” and enter your user ID and password. If you transition to the management screen, the login is completed.
- The main causes that cannot be logged in to WordPress are “1. The username (email address) and password are wrong”, “2. Login URL is wrong” “3. Cookies are old” 4. “404 Not Found” is displayed and cannot be logged in. “” 5. “500 Internal Server Error” is displayed and cannot be logged in. ” -There are “database plugins, themes, etc.” I want to solve them in the correct way.
- WordPress is an open source CMS used by people around the world, so no one who takes on vulnerabilities and attack cyber attacks is endless. It is necessary to strengthen the security of WordPress login screen.
- To enhance the security of the WordPress login screen, there are two major methods: “Customize the 1. WordPress login screen and enhance authentication” and “2. WordPress access restriction”.